
Are you worried about toilet leaks damaging your floor and property? Installing or replacing a toilet wax ring can save you from such nightmares.
You can easily do it yourself with this guide. Get ready to prevent costly leaks, and install or replace a wax ring like an expert!
Installing and replacing a toilet wax ring is not a difficult job, but it’s an important one. It is the essential seal between the toilet and the waste pipe in the floor below. No matter what type of toilet you have, it must be properly sealed in order for it to work correctly.
In this guide, we’ll explore how to identify a faulty wax ring, how to replace it with a new one, and how to install a new wax ring. We’ll also look at some helpful tips and tricks that can help make this job easier.
Finally, we’ll discuss the possible consequences of having an improperly installed or leaking wax ring so that you can be sure to do it correctly from the start. By following these steps carefully, you will ensure your toilet runs properly and without leaks for many years to come!
Explanation of toilet wax ring
A toilet wax ring is an essential part of a functioning toilet. It is a round or oval shaped wax pad made from paraffin-based material and helps to seal the connection between the toilet bowl and the drain. This seal prevents water from leaking and keeps odors in the bowl from rising up into your home. Installing a new wax ring is usually recommended after replacing a toilet, as it helps ensure maximum efficiency and will make sure that it’s installed properly. Replacing a wax ring can also help if your toilet is leaking or if there are unpleasant odors coming from your bathroom.
When installing or replacing a wax ring, be sure to carefully clean all surfaces around the drain hole on both sides of the flange in order to get the best possible seal with no gaps where water could potentially leak through. Regular cleaning of the surface would also help extend its life expectancy and make sure that it can function properly for years to come. Check for leaks after installation, filling each tank of water two to three times in order for any potential problems to be detected promptly.
Importance of installing and replacing toilet wax ring to prevent leaks
The wax seal located between the toilet bowl and the flange is an important part of your bathroom’s plumbing system. An incorrectly installed or leaking wax ring can cause unpleasant odors, water stains, and, in extreme cases, costly water damage to your home. As such, it’s essential for any homeowner to understand the correct way to install a new wax ring and replace an existing one when necessary.
When a wax ring becomes damaged or deformed due to shifting or age, it will no longer form a tight seal between the drain flange and the bowl. As a result, the seal will be unable to contain the pressure from water in the trap below and prevent leaks. A range of problems can arise from a defective wax ring such as foul smells arising from sewer gas entering your home or water infiltrating your floors and walls. Additionally, some municipal code require all fixtures including vacant fixtures be sealed at all times which is another reason why it’s important to ensure that wax rings are properly installed and maintained.
In order to prevent these issues from occurring, it’s important that homeowners learn how to identify signs of damage like excessive condensation on walls near bathrooms which may indicate a leaky toilet seal caused by a damaged wax ring as well as how to correctly install or replace them themselves or seek professional assistance when necessary. Through proper installation and maintenance of your toilet’s wax rings you will not only save time but also money spent on potential repairs caused by costly water damages that might have been prevented if proper attention was given upfront!
Additional Tips and Maintenance
To make sure your installation is perfectly sealed, there are a few extra steps you can take:
- Make sure the base of the bowl is level and that the flange sits flush with the floor. This will minimize the risk of leaks and ensure a good seal between the wax ring and toilet.
- If you’re installing a new flange or new wax ring, use plumbers’ putty on top of it to prevent leakage.
- If you plan on replacing your wax ring in the future, make sure to clean any debris and grime off of it before doing so. This will help ensure a better seal.
Regular maintenance is essential once your toilet wax ring is installed— especially if there are water stains around the base of your toilet, which could indicate leakage. Check for loose bolts or cracks in your wax ring periodically to avoid serious problems like sewage leaks! Additionally, examine caulking around the base to check for any cracking or gaps that need repair or replacement.
Tips for preventing future leaks
To prevent future leaks due to age or damage, there are some steps you can take to ensure the wax ring seals properly.
Firstly, be sure to measure the hub of the toilet to make sure you get the right size wax ring. Plastic wax rings come in many different sizes, and it’s important that you get one that fits snugly around the hub for a good seal.
You should also check and make sure that the flange (the pipe which attaches to your drainage line) is level and correctly sized. If it isn’t flush, you may want to invest in a specialized flange extender which helps create an even seal on both sides of your toilet-to-drain connection.
Lastly, be sure to replace any worn out rubber or foam seals, gaskets or washers as they may allow water seepage.
Regular maintenance to keep the wax ring in good condition
Maintaining and regular checks can ensure the wax ring remains in good condition, preventing potential leaks. Over time, the wax ring may harden or crack due to constant exposure to moisture and other environmental factors, so it is important to check it from time to time to make sure it is in proper working condition.
Here are a few tips for maintaining your wax rings:
- Check the toilet bowl for cracks and damage. If you find any signs of wear or damage, replace the piece immediately to prevent further damage and leaks.
- Make sure that the toilet base is firmly connected to the floor and that all screws are tight. Check for any gaps or cracks around the toilet base which might indicate that it is no longer securely attached to the floor.
- Examine any fittings around the bottom of the toilet bowl for signs of corrosion or damage. Make sure they are not loose and have no gaps, as even a small gap would allow water leakage into low areas of your bathroom flooring which could result in extensive water damage over time.
- If you find any issues with your fittings that need immediate attention, call a certified plumber right away as they can help you safely replace damaged parts without risking further leakage or water seepage into your subfloors or walls!
Reinstalling the Toilet
When the new wax ring and flange bolts are in place, set the toilet firmly on top of the wax ring and secure it with the two washers and nuts that came with it. Make sure to hand-tighten them rather than use a wrench — over-tightening can crack the porcelain. The toilet should fully rest on top of the flange.
If this doesn’t happen, you may need to replace your flange by removing mounting screws around its edges and pulling it out of its opening. Otherwise, you will not have enough support stabilizing your toilet from underneath.
Once everything is secure, install a water supply line connection if necessary or desired and then proceed to using caulking around its base for additional protection from water leaks.
Preparation
A toilet wax ring is an essential part of the toilet installation process. This wax-based seal prevents leaks by filling in any gaps between the base of the toilet and the flange on the floor. To make sure your installation goes smoothly, it is important to take prepare beforehand. Here are some key steps for preparation:
1.Determine if you will be replacing a faulty wax ring or installing one for an entirely new toilet installation: If the existing ring is damaged, it will need to be replaced. If working from scratch, determine what size you will need and acquire it along with any other items that may be needed for your specific new toilet setup (e.g., wax-free seal).
2.Clear a workspace: Be sure to clear out enough space to work and store supplies — you should have an area with plenty of ventilation and no flammable items nearby as some products may contain chemicals and/or emit fumes while curing after installation.
3.Gather all necessary tools: You’ll want to assemble all tools before beginning so you don’t have any surprises during the install process! Tools typically include things like an adjustable wrench, pliers, screws (stainless steel is ideal due to corrosion resistance), caulking, sealing compound, putty knife, and Teflon goods (to protect surfaces).
Step-by-step guide for reinstalling the toilet
Reinstalling the toilet is a relatively simple process, but it should be handled with caution to avoid damaging the wax ring. Follow these steps to properly reseat your toilet:
- Shut off the water supply and flush to empty the tank and bowl. Carefully wrap a towel around the floor flange and loosen the nuts that hold it in place with an adjustable wrench.
- Remove old bolts signaling loose connection which may break cleanly during removal or strip their threads when you try to remove them. This can be due to corroded nuts or bolts, so be prepared for either possibility. If necessary, clean up any residue from broken bolts for easy reinstallation of new ones.
- Scoop out old wax ring from inside the flange and discard it accordingly but remember not to flush it down the drain or throw it away in regular trash as this could cause unwanted clogs further down your plumbing system leading to further expensive repairs or replacements later on!
- Thoroughly dry inside of toilet flange prior to installing new wax ring for proper adhesion, avoiding use of caustic chemicals which may corrode underlying plumbing materials upon contact over time if not completely rinsed away post-application/cleanup process. Take extra care when inserting bolts into holes – they should go without much effort since they are meant specifically fit snugly into those openings securely ensuring there will not be unnecessary shifting within surface area during installation process itself (and thereafter). Make sure each bolt is set far enough that you can still tighten nuts once everything is lined up properly, but don’t overtighten them – just enough so they aren’t easily movable anymore without loosening efforts first!
- Place wax ring firmly onto underside of bowl before tightening screws onto floor flange plate beneath hole created thus far (tape measure will be helpful here too). Line up toilet bowl with existing plumbing lines as close as possible by making small adjustments if necessary until both are perfectly aligned for secure fastening later on…
- Now simply tighten nuts securely against underside of porcelain fixtures using wrench (do not overtighten!). Reconnect water supply line(s) if applicable back onto their original positions before turning flow valve located near wall backwards clockwise once again allowing access return all other previous connections made initially – such as handle mechanism lever arm(s) etc… Finally…add generous mount of sealant along joints between base paneling around outside perimeter where toilet seating point meets exterior walls; this acts both as moisture/water barrier placed optimally right here areas most likely exposed wetness/splashback conditions user may come across during usage so sealant job done well will ultimately prevent any leaks going forward!
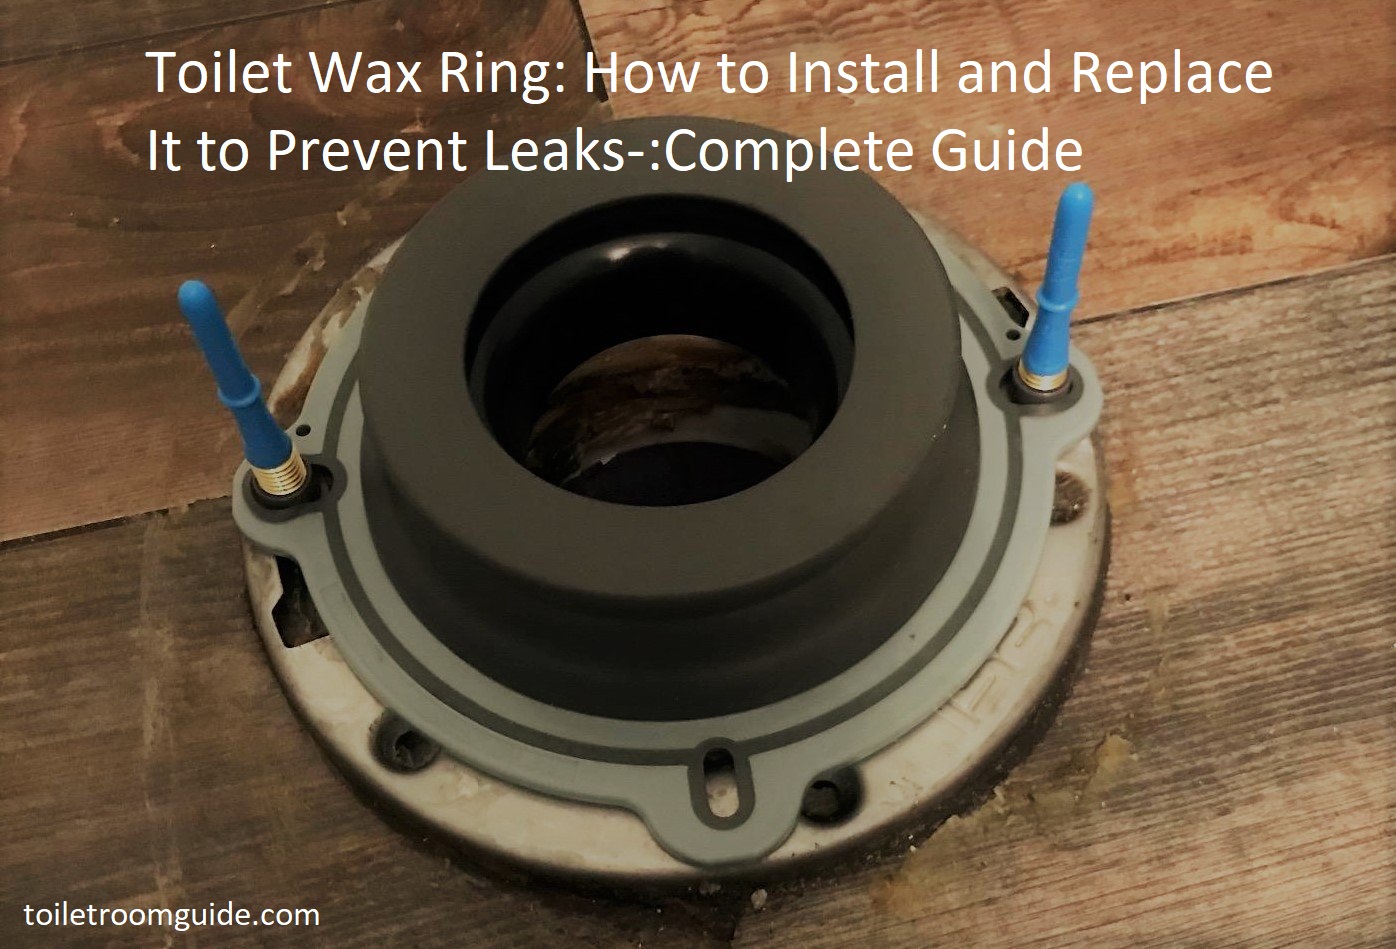
Installing the New Wax Ring
Before installing the new wax ring, it is important to clean the surface of the flange. Use a scrub brush and warm soapy water to remove any dirt, debris or grease that may be present. Once cleaned, inspect for any cracks or damage in the flange that could cause leaks. If significant damage or corrosion is discovered, replace the entire flange.
Next, locate one of the toilet horns (the flat sides of this wax ring that fit into the drilled channels of a 2-piece toilet’s closet flange). The horn should point toward the back centerline of the toilet, as illustrated on the instruction sheet that comes with each vinyl toilet wax ring, and then slip into place. The downward pressure from setting your toilet onto this new wax ring will compress it around your drain pipe and form a tight seal against potential leakage. Before placing your toilet onto this newly installed wax ring, apply a thin layer of petroleum jelly over its upper surface to further assist in creating a watertight seal once compressed.
Finally, carefully set your toilet over your newly installed wax ring ensuring proper alignment with its closet bolts prior to tightening down on all four bolts evenly and firmly to avoid any possible breakage when securing it in place.
Preparation
Adequate preparation is essential for a successful toilet wax ring installation or replacement job. Before beginning, make sure you have the following supplies and tools on hand:
- New toilet wax ring
- Sponge/cloth
- Bucket
- Scrub brush
- Pliers or adjustable wrench
- Rubber gloves for protection
- Disinfecting cleaner and scrubbing pads (for cleaning the floor around toilet base)
Note: Always wear protective equipment, such as rubber gloves, when working with and around bathroom fixtures. Also, be sure to turn off the water supply before beginning any repair work.
Step-by-step guide for installing the new wax ring
Installing a toilet wax ring is a straightforward task that many homeowners can complete themselves. Following the instructions below, you should be able to successfully install a new wax ring and ensure that it functions correctly. This guide assumes the pre-installation step of removing the old toilet have been completed.
- Install the Toilet Anchor Bolts: Place one plastic or brass anchor bolt in each of the holes in the flange and secure them with either washers or nuts and make them hand tight.
- Place Wax Ring in Position: Apply some petroleum jelly to the plastic anchor bolts to decrease friction and then position the wax ring over them on top of the closet flange. Once it is positioned correctly, press down gently so it forms an air-tight seal between your floor and toilet bowl base.
- Lift Toilet Bowl Into Position: Carefully lift your toilet bowl into position so that its base sits firmly onto the wax seal. Then rock it slightly from left to right to secure a good seal with not gaps visible when looking around from beneath.
- Tighten Bolts: Using a wrench, tighten both top nuts atop your toilets anchor bolts below until they feel securely tight against your toilet bowls base while still allowing you some movement in its rotation if necessary during installation.
- Secure Tank: Secure your toilet tanks mounting bolts beneath by tighten with no more than ¼ turn roundclockwise until they are securely tight but not too tight as this could crack or damage the porcelain tank upon usage!
This concludes our step-by-step guide on how best to install a new waxy ring underneath any given flush toilet, ensuring no leakage occurs over time during use!
Conclusion
When installing or replacing a toilet wax ring, safety is the top priority. It is important to wear the correct protective equipment and use appropriate tools for the job.
Additionally, there are a range of installation techniques for different toilet styles and base designs that should be followed to ensure proper fitting and sealing.
Once the new wax ring has been securely in place, testing should be done with enough water pressure to confirm that it is watertight.
Following these steps will help you complete your project quickly and efficiently while ensuring that your bathroom remains safe and leak-free.
FAQ’s
How do I stop my wax ring from leaking?
To stop a wax ring from leaking, you can try tightening the bolts that hold the toilet to the flange or replacing the wax ring altogether. It’s also important to make sure that the toilet is properly aligned on the flange and that there are no cracks or damage to the flange or toilet base.
How do you replace a leaking wax ring on a toilet?
To replace a leaking wax ring on a toilet, first turn off the water supply and flush the toilet to empty the tank and bowl. Remove the bolts that hold the toilet to the flange, lift the toilet off the flange and remove the old wax ring. Clean the flange and toilet base, install the new wax ring, and then carefully lower the toilet onto the flange and secure it with new bolts.
How do you install a toilet so it doesn’t leak?
To install a toilet so it doesn’t leak, it’s important to make sure that the wax ring is properly installed and that the toilet is securely bolted to the flange. Additionally, make sure that the toilet is level and not rocking, as this can cause the wax ring to fail. You can also use a bead of silicone caulk around the base of the toilet for added protection against leaks.
How many years does a wax ring last?
The lifespan of a wax ring can vary depending on factors such as usage and maintenance, but on average, a wax ring can last anywhere from 5 to 10 years.
What happens if wax ring is leaking?
If a wax ring is leaking, it can cause water to seep out from the base of the toilet, leading to water damage and potential mold growth. It can also cause foul odors and make the bathroom unpleasant to use.
What can I use instead of a wax ring?
There are several alternatives to traditional wax rings, such as rubber gaskets, foam gaskets, and wax-free gaskets. These options can be more durable and easier to install than wax rings.
Do you need to replace wax ring every time?
It’s recommended to replace the wax ring every time you remove the toilet to ensure a proper seal. Reusing an old wax ring can lead to leaks and other issues.
Which is better toilet wax ring or rubber?
Both toilet wax rings and rubber gaskets can provide a good seal, but rubber gaskets can be easier to install and more resistant to damage than wax rings.
What causes a toilet to leak from the bottom?
A toilet can leak from the bottom due to a faulty wax ring, loose bolts, a damaged flange, or a cracked toilet base. It’s important to identify the cause of the leak and address it promptly to prevent water damage.
How thick of a wax ring do I need?
The thickness of a wax ring can vary depending on the type and brand, but typically a standard wax ring is around 1/4 to 1/2 inch thick. It’s important to choose a wax ring that matches the size of the toilet and flange to ensure a proper seal.
See more-
- Best toto toilet 2023
- Best handicapped toilet 2023
- Best upflush toilets 2023
- Best kohler toilet 2023
- Best wall hung toilets 2023